To many new backpackers, time spent on the trail can appear to be a chore. You load up your heavy backpack with 40 pounds of substances till you’re nearly falling over backwards, and then you do a dying march down the path till you reach camp.
But, what if I advised you that with somewhat little bit of know-how, you’ll have the ability to lighten your load and truly benefit from the hike?
One of one of the best methods a newbie backpacker can improve their expertise is to start in search of ways to hold much less weight in your backpack. With a lighter load, you’ll find a way to hike farther and faster, see more of the backcountry and do it all with much less strain and exhaustion.
But getting began with ultralight can appear actually intimidating.
Ultralight gear tends to be expensive, hard to buy and complicated to know. To anybody just starting out, it’d appear to be you need a level in Materials Engineering – plus a very deep bank account – to sift by way of the entire recommendation.
Fortunately, it doesn’t have to be all about carbon fiber and titanium.
That’s why I put collectively an inventory of easy ways to get started with lightening your load – for cheaper than you might expect. I tried to make this a list of only essentially the most beginner-friendly methods to keep away from wasting weight (and cost) when gearing up on your next massive backpacking journey.
1. Trail Running Shoes instead of Leather Hiking Boots
Weight Savings: 1.5 pounds (times five!)
Cost Savings: $120
Studies have proven that carrying an additional one pound in your foot tires you out as much as carrying five extra kilos on your again. This makes footwear a fantastic place to shave weight.
While historically, hikers have most well-liked tall, heavier boots for his or her “ankle protection,” there’s a rising college of thought that it is actually higher to let ankle joints deal with uneven terrain as a substitute of maintaining them inflexible and sending the shock up into the knees and hips.
Plus, lighter footwear break in sooner, are more gratifying to walk in, and can breathe higher, making it much less probably that you’ll get hotspots or blisters.
My recommendation: New Balance Leadville v3.
2. Rain Hoodie as an alternative of Waterproof-Breathable Jacket
Weight Savings: 10 ounces
Cost Savings: $80
Anyone who has spent various hours outdoor in the rain knows that you’ll ultimately get wet, it doesn’t matter what you’re wearing. Those costly, waterproof breathable jackets will both wet through, or you’ll sweat them out from the within.
So why pay so much extra for “technology” that doesn’t actually hold you dry and weighs twice as much?
Lightweight rain hoodies and “windshirts” offer barely much less safety but weigh (and cost) much less than heavy responsibility, 3-layer Goretex shells. Plus they’re much extra breathable, so you probably can truly hike in them without sweating up a storm. They’re perfect for hiking or hanging round camp in mild to moderate rain without ending up drenched in sweat.
My recommendation: Outdoor Research Helium II Jacket.
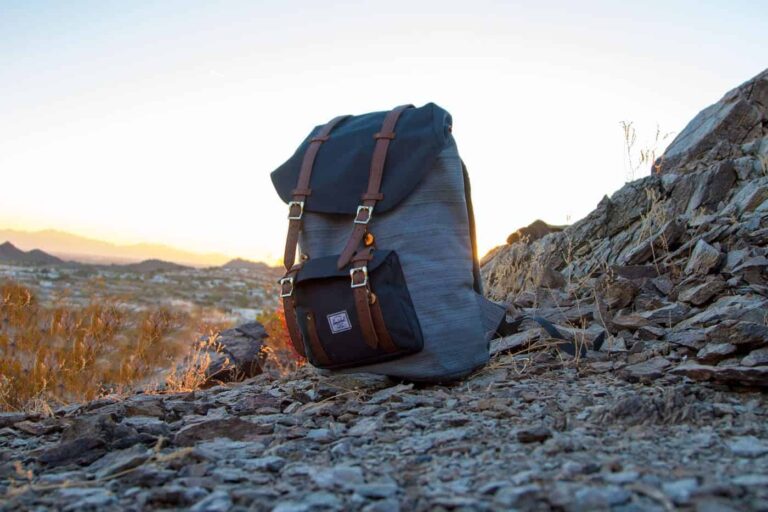
3. Smaller Backpack as a substitute of Extended Trip Pack
Weight Savings: 2 kilos
Cost Savings: $150
The more room you’ve in your backpack, the extra you’re tempted to carry. Most backpacks don’t load very nicely until they’re mostly full, so shopping for a large pack means you’ll virtually definitely end up carrying more than should you had bought a smaller one.
Having a smaller backpack forces to be sensible about what you deliver, and is a superb basis for going lighter. If most of your journeys are only 3-4 days max, ditch the 70L+ bag and go along with something with liters of carrying capacity.
My suggestion: Osprey Talon 44 Pack.
4. Garbage Bag instead of Pack Cover
Weight Savings: four ounces
Cost Savings: $30
A rubbish bag is cheaper than a pack cover since you already have a dozen underneath your kitchen sink.
Unlike a pack cowl, the rubbish baggage can go on the within of your pack, along with your gear inside. This allows you to cinch down the highest to seal out rain, and also makes it simpler to maintain the within of your bag clear in case of spills.
The solely real draw back is that the outside of your pack can get wet (and heavier) if it’s uncovered to a lot of rain.
5. Duct Tape instead of Sewing Repair Kit
Weight Savings: 6 ounces
Cost Savings: $20
A few toes of professional quality tape is all that you actually need to fix most gear issues or malfunctions. From boots to backpacks, rain flies to sleeping pads, duct tape actually does fix all of it. In a pinch, you’ll be able to even use it to help seal wounds, prevent blisters, stabilize joints and assist with a variety of different backcountry first help tasks.
Granted, once you get back to the trailhead, it’s your decision to try actually fixing the issue, however a yard of duct tape wrapped round a climbing pole, flashlight or water bottle can get you pretty far.
My recommendation: Gorilla Tape.
6. Homemade First Aid Kit as a substitute of a Pre-Made One
Weight Savings: 1.5 kilos
Cost Savings: $50
Some backpackers carry a first aid package as if they’re a combat medic heading into battle. A frequent theme in ultralight is that you can’t presumably put together for each “what-if” state of affairs, so just concentrate on the ones that you’re most probably to encounter.
You ought to think about the actual potential medical problems you’ll run into on your journey and put together for these. I’ll be doing a full information on first aid kits quickly, so subscribe if you need to be taught what you really should (and shouldn’t) be carrying.
7. Permethrin-Treated Clothing instead of Bug Spray
Weight Savings: 4 ounces
Cost Savings: $5
Permethrin is the “secret ingredient” embedded in the bug repellent clothing you see in the stores. It solely take a few minutes to spray it in your clothes at residence outside. Once it dries, there’s no smell or residue and it lasts for a quantity of washes earlier than needing to be reapplied.
Think about treating your long-sleeved items that you’ll put on around camp, as properly as hats and socks. Any garment you already personal can turn into “bug proof” and now you won’t have to hold something to fend off the bugs. You can even try to keep away from tenting in high-traffic campsites close to water, where bugs tend to thrive.
My recommendation: Sawyer 12oz Permethrin Trigger Spray.
8. Travel-Sized Bottles of Gels as an alternative of Full-Sized
Weight Savings: eight ounces
Cost Savings: $20
There’s no means you’re going to go through a complete bottle of sunscreen, toothpaste or hand sanitizer in your journey, so why bring it all?
Travel-sized bottles are nice for many journeys. You can save them when they’re empty and simply refill from the larger bottles you already have in your home.
My recommendation: Nalgene Small Travel Kit.
9. Pocket Stove as an alternative of Full Cooking System
Weight Savings: 7 ounces
Cost Savings: $60
The essential components of a stove are the gasoline canister and a burner, why would you need anything else? With a pocket stove, you easy screw the burner instantly onto your fuel canister and place the pot on prime of that, simple!
Make sure to deliver a lighter and follow lighting the range before you head out into the backcountry with it. You’ll also want to select up a canister of fuel at you local outfitters, since it can’t be shipped from online retailers.
My advice: MSR PocketRocket.
10. Small Aluminum Pot instead of Steel Pot Sets
Weight Savings: 2.5 kilos
Cost Savings: $50
When planning your backpacking meals, one of your considerations ought to be how simple it is to organize. Fortunately, there are tons of delicious meal choices you might make with solely 2-3 cups of boiling water and a pot.
Just bring the water to a boil, add your carb (pasta, rice, couscous, etc), stir your protein and sauce in on high and voila! A easy, one pot meal. Much lighter than carrying a full pot set, and easier to clean up as properly.
My advice: Snow Peak 900.
11. Spork instead of Full Utensils, Plates and Bowls
Weight Savings: 12 ounces
Cost Savings: $25
When it involves cookware in the backcountry, simpler is better because it means less mess and cleanup afterwards. If you’re by yourself or in a small group, just eat straight out of the cooking pot.
I’ve discovered plates to be especially useless in the backcountry. I’ve still never used the aluminum ones I obtained again in center faculty. For ultra-cheap, grab some plastic take-out utensils from an area restaurant.
My recommendation: Sea to Summit Ultralight Spork.
12. Sawyer Mini instead of Traditional Water Pump
Weight Savings: 14 ounces
Cost Savings: $65
Sawyer minis are like a less-awkward Life Straw, a quite simple, self-contained water filter the place soiled water is pulled in from one end and comes out clean on the opposite end. Water could be pulled by way of with gravity, or by merely sucking it by way of the filter.
This saves tons of effort and time over extra conventional hand-pump filters. Using a small, suction powered filter also allows you to fill at a water source and keep right on mountaineering, as an alternative of sitting there and pumping for 15 minutes. They’re also easier to clean and service in the backcountry.
My advice: Sawyer Mini Water Filtration System.
thirteen. Soft-Sided Water Bladder as an alternative of Metal Bottle
Weight Savings: 14 ounces
Cost Savings: $25
A soft-sided squeeze bag water bottle weighs much less than even a plastic nalgene, not to mention a metallic, vacuum-sealed bottle. But it still maintain the identical quantity of water.
High-quality ones can even hold boiling liquids and take a beating with out leaking. Plus, they roll up and disappear when you’re not utilizing them.
My recommendation: Platypus PlusBottle 34oz Water Bottle.
14. 2 Liters of Water Carrying Capacity as an alternative of 3L+
Weight Savings: 2.2 kilos per liter
Cost Savings: $20
At 2.2 pounds per liter, water is doubtless one of the heaviest potential issues you’ll have the ability to carry on a backpacking trip. There’s a reason most backpacking meals are “dehydrated” to remove all that weight. You don’t want to hold enough water to keep a small Little League staff well-hydrated.
Carrying one less liter of water can make your complete pack 15% lighter. Unless you’re actually mountaineering in the desert, likelihood is you’ll pass 2-3 water sources per day the place you presumably can easily stop and refill.
Plus, in case you have a quick suction filter, you can fill up your water bottle and chug it down on the water supply, after which fill a bit more to tide you over till the next one. This helps you keep away from having to hump round excess water and goes an extended method to lightening your load.
Weight Savings: eight ounces
Cost Savings: $75
One of essentially the most iconic items of backcountry gear is the straightforward blade, useful for all manner of camp tasks. But for some cause, many backpackers think that they’ll also need to pack in 3 screwdrivers, pliers, a wire-stripper and an axe.
When backcountry tenting, I’ve actually never wanted greater than 2-3” inches of blade for slicing cordage and wedges of cheese. My half-pound multitool was one of many first issues I dropped from my bag once I began getting severe about dropping weight.
My recommendation: Bantam by Victorinox (pictured).
16. Smartphone App as a substitute of Dedicated GPS Unit
Weight Savings: 6 ounces
Cost Savings: $100
Chances are you’re already taking your smartphone out on your hikes with you, and never leaving it in your automotive on the trailhead. Why not reap the benefits of the built-in GPS antenna that features pretty well, even when the telephone is in battery-saving airplane mode?
Your cellphone in all probability has a larger, easier to read display screen then most handheld GPS items obtainable at present. Plus it uses gesture controls you’re already familiar with, as a substitute of clunky buttons.
Download some “offline” maps earlier than your trip utilizing a devoted mapping app like Gaia GPS to convert it to a full-fledged GPS. You additionally get some ultralight bonus factors since your smartphone additionally functions as a camera and, you understand, a communication device (when you’ve service).
My suggestion: Gaia GPS app for iOS and Android.
17. Small Headlamp as an alternative of High-Powered Flashlight
Weight Savings: 2 ounces
Cost Savings: $15
You solely really want about a hundred lumens for night time hiking and lumens to securely carry out camp tasks. Any brighter than that and you’ll just shine it in people’s eyes and piss them off. Plus, it’s higher to get acclimated and let your eyes modify – aren’t you making an attempt to escape all of those shiny metropolis lights?
Batteries in general are usually pretty heavy for their measurement, so attempt to get a headlamp that makes use of AAA or button-sized batteries should you can. Lithium batteries are lighter and final for a lot longer than alkaline, however are usually more expensive.
My suggestion: Petzl e+LITE Headlamp.
18. 40° Sleeping Bag as an alternative of 20° Sleeping Bag
Weight Savings: varies
Cost Savings: varies
Are you really going to be out on a backpacking trip when temps are under freezing? Then why pay for (and carry) all that further insulation? You’ll probably just roll round all night sweating and uncomfortable when temps are realistically going to be nearer to 50° or 60°.
If you solely hike in snug three-season circumstances, there’s no need to get one thing that heavy (and expensive).
My suggestion: Kelty Cosmic Down 40 Sleeping Bag.
19. Closed-Cell Foam Pad instead of Inflatable Pad
Weight Savings: 1 pound
Cost Savings: $50
The only piece of substances that I still carry from when I first began backpacking as a kid is my Thermarest Z-Rest. I found it as a camper when my pack felt too heavy and I was looking to trade with different campers for lighter gear. I spent one night time sleeping on a borrowed z-rest and fell in love.
There’s no want to wait for it inflate or blow into it until you’re light-headed, simply toss it across your sleeping spot and it’s ready to go. There’s additionally no want to fret about punctures or carrying patch kits. If it rips, simply duct tape it again in line.
It can be simply folded into different configurations for sitting pads, chairs or improvised splints. Need extra back or hip support? Just fold it over an extra time in the center and it’ll feel like you’re sleeping on a cloud… on the bottom. 😉
My advice: Thermarest Z Lite Sol Sleeping Pad.
20. Clothing Stuff Sack instead of Camp Pillow
Weight Savings: 9 ounces
Cost Savings: $20
This one is a 100 percent weight financial savings since you’re already carrying a couple of further items of socks or garments. Just shove them into a small stuff sack and use that as a pillow instead of carrying a separate item.
A massive a part of going ultralight is finding a quantity of makes use of for gadgets you’re already carrying, as an alternative of carrying particular, purpose-built gear for everything. A pillow is a superb place to start.
Hopefully that offers you some good ideas for how to save weight and cost in your backpacking gear. In total, the following pointers can help you shave over 10 pounds of gear from your pack and maintain $1000 in your wallet.
For some, this listing might be all you want to strike the stability between comfort in camp (amenities) and luxury on the path (lightweight). But for others, it could be only the start. Eventually you can start sleeping underneath tarps, cooking over a cat food tin and slicing the handle off your toothbrush.